 Blog
Blog
How to Write a Procedure for a Lab: A Practical Guide
You finish a practical or experiment late in the day, write “incubate briefly,” “wash as usual,” and “spin down samples” in your notebook, then move on. Two weeks later, you need to repeat the work. Now those notes are useless. Was “briefly” 30 seconds or 5 minutes? Which wash buffer did you use? What speed was “spin down”?
That’s how procedures fail in real labs and student practicals. Not because the science was weak, but because the record was too vague to survive time, handoff, or scrutiny. If you’re learning how to write a procedure for a lab, the goal is not to sound technical. It is to write a method for a practical or experiment that another competent person can follow exactly, including your future self when the context is gone.
A strong procedure does three things at once. It preserves reproducibility, reduces preventable mistakes, and turns even failed experiments into usable data for the next round. That’s the standard worth writing to.
Table of Contents
If you also build formal SOPs for teams, a dedicated sop maker can help turn a rough bench method into a cleaner operating document, but the writing principles below still decide whether the procedure is usable.
- Why Your Lab Procedure Is the Most Critical Document You'll Write
- What Makes a Good Lab Procedure
- Structuring Your Procedure for Absolute Clarity
- Example Formats for Writing a Lab Procedure
- From Blank Page to Actionable Steps
- Advanced Procedure Writing and Management
- Common Procedure Writing Mistakes to Avoid
- Beyond Paper Notes Capturing Your Procedure with an ELN
- Making Every Experiment Count
- Frequently Asked Questions
Why Your Lab Procedure Is the Most Critical Document You'll Write
A lab procedure is a promise. It tells another scientist, “If you follow this exactly, you should be able to repeat what I did.”
That expectation isn’t new. Scientific procedure writing has carried that burden since Robert Boyle’s The Sceptical Chymist in 1661, where methods needed enough detail for exact replication by another competent scientist. That standard still matters because modern science still breaks when methods are unclear.

The scale of the problem is hard to ignore. A 2016 Nature survey found that over 70% of researchers had failed to reproduce another scientist’s experiments, part of a reproducibility crisis that wastes an estimated $28 billion annually in U.S. biomedical research.
That sounds abstract until it lands on your bench. Then it looks like this:
- A repeat run fails because the reagent concentration wasn’t recorded.
- A trainee improvises because “mix thoroughly” meant something different to them.
- A deviation disappears because no one documented it when it happened.
- A successful result becomes hard to defend because timing and sequence weren’t captured clearly.
Practical rule: If a reader has to guess, the procedure is incomplete.
The best procedures aren’t long for the sake of being long. They are specific where specificity matters. Reagent amounts must be exact. The flow of the experiment must be clear. Decision points must be visible. If the experiment fails, the procedure should still let you reconstruct what happened and plan the next iteration.
That’s why this document matters more than most students think. It isn’t clerical work. It’s experimental control written down.
What Makes a Good Lab Procedure
The standard is simple: could a competent person run the work without standing next to the original writer? That test matters for both school practicals and research methods. If a reader still has to ask what to prepare first, which quantity to use, what setting to choose, or what observations to record, the procedure is not finished.
A strong procedure needs four things. First, reproducibility: the steps must be sequenced clearly enough that two people would perform the same actions in the same order. Second, operating detail: timings, temperatures, volumes, concentrations, labels, and instrument settings need to appear where they affect the run. Third, recordability: the method should say what must be written down during the experiment, not just what should be done. Fourth, transferability: a non-expert with basic training should be able to follow it without filling gaps from local habit.
Some omissions are immediate red flags. “Use standard conditions,” “incubate briefly,” missing control conditions, and unlabeled sample handling all make a procedure inadequate because they break reproducibility. A fast quality check is to ask a second reader to point at the exact line that tells them what to do next. If they cannot, the writing still assumes too much. That approach aligns with practical lab-writing guidance from sources such as Scribbr’s methods-section overview and university lab-report resources like the University of Wisconsin’s writing guide.
Structuring Your Procedure for Absolute Clarity
A usable procedure starts before Step 1. For a lab practical or experiment, readers usually need the same core information in the same order: what the task is, what materials are needed, how the setup should look, what actions to perform, what to observe, how results will be handled, and where safety matters.
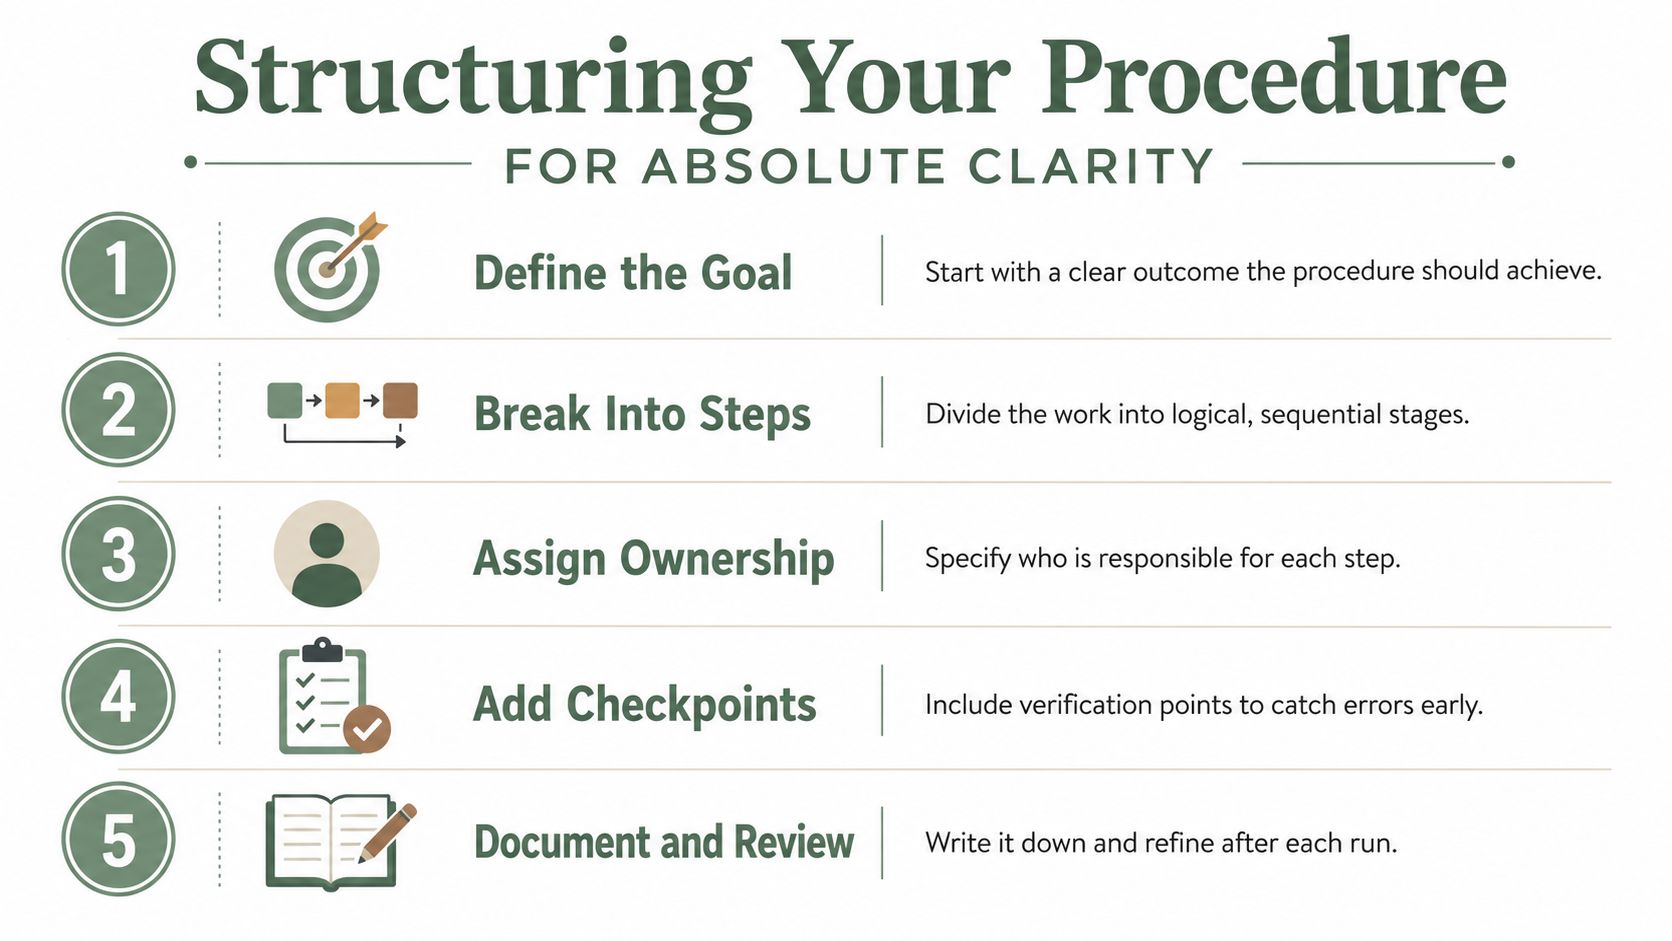
The reader needs to know what the experiment is, why it exists, what they need, what they must record, and how they’ll recognize whether the run stayed on plan.
Start with identity and purpose
A procedure should open with enough context that someone can identify it instantly.
Include:
- Title and authors. Name the experiment clearly and record who wrote or revised the procedure.
- Purpose or objective. State the exact goal. For example, “Detect target protein expression in cell lysates by Western blot.”
- Scope. Note what the procedure covers and what it doesn’t.
- References. If you’re adapting a published method or lab manual, cite it rather than retyping every inherited step.
A short purpose statement keeps people from following a method mechanically without understanding the endpoint. That matters when something goes off script.
Here’s a simple example for a Western blot procedure:
Determine whether the treatment group shows detectable change in target protein abundance relative to control lysates under the specified lysis, loading, transfer, and detection conditions.
Later, if a colleague asks why the transfer membrane type or antibody dilution matters, the objective gives the answer. It ties the step back to the result.
To see a quick visual walkthrough of procedural structure, this overview is useful:
Build the procedure around execution
For a school or university practical, the clearest format is usually this order:
- Aim: one sentence stating what the experiment is testing or measuring.
- Apparatus and materials: equipment, reagents, samples, and key quantities.
- Setup conditions: temperatures, starting volumes, labels, control samples, instrument settings, and any pre-run preparation.
- Numbered method steps: each action in the order it is performed.
- Observations to record: colour changes, readings, timings, masses, temperatures, endpoint cues, or anomalies.
- Calculations or result handling: formulas, averaging, graphing, dilution calculations, or normalization steps.
- Safety notes where relevant: placed inside or next to the step that uses the hazard, not buried far away.
That sequence works because it matches how people execute a practical. The most common failure in weak student methods is not bad grammar. It is missing setup information before the action began.
For broader laboratory work, the same logic applies even if the labels change. A research SOP may use sections such as scope, responsibilities, materials, procedure, records, deviations, and references. A practical write-up may sound simpler, but it still needs the same operational backbone.
Here is a compact practical-style outline:
Example outline: determining the pH change during an acid-base titration
- Aim: Determine the volume of 0.100 M NaOH required to neutralize 25.0 mL of HCl.
- Apparatus/materials: Burette, pipette, conical flask, pH indicator or pH meter, 0.100 M NaOH, HCl sample, distilled water.
- Setup conditions: Rinse burette with NaOH, label flask as Sample 1, record initial burette reading to 2 decimal places, carry out experiment at room temperature.
- Procedure: Pipette 25.0 mL HCl into flask; add 2 drops indicator; add NaOH in 1.0 mL portions while swirling; near endpoint, add NaOH dropwise; record final burette reading.
- Observations: Initial and final readings, colour change point, any overshoot, repeat trials.
- Calculations: Volume of NaOH used; mean titre across concordant trials.
- Safety: Wear eye protection during acid and base handling.
Readers typically want a procedural protocol, not a theory summary, but a full experimental order they can copy into a report or use at the bench. It is also the clearest answer to questions about procedure lab work, a procedure for an experiment, or a lab practical procedure.
Clarity comes from structure first. Wording matters, but it can’t rescue a badly organized method.
Example Formats for Writing a Lab Procedure
Different labs need different formats, but most good procedures fall into one of two patterns.
Format 1: School or university practical
Use this when you are writing up a class experiment, assessed practical, or undergraduate lab report.
Title
Effect of light intensity on the rate of photosynthesis in pondweed
Aim
Measure how changing the distance of a lamp affects oxygen bubble production.
Apparatus and materials
Pondweed, beaker, lamp, ruler, stopwatch, sodium hydrogencarbonate solution, thermometer.
Setup conditions
Place 200 mL of sodium hydrogencarbonate solution in a beaker. Cut the pondweed stem under water. Keep room temperature constant. Position the lamp 10 cm from the beaker before the first run.
Procedure
- Place the pondweed in the beaker with the cut end facing upward.
- Position the lamp 10 cm from the beaker.
- Allow the setup to equilibrate for 2 minutes.
- Count bubbles released over 60 seconds.
- Record the bubble count.
- Repeat twice more at 10 cm and calculate the mean.
- Move the lamp to 20 cm, 30 cm, and 40 cm, repeating Steps 3 to 6 each time.
Observations/results handling
Record bubble counts for each distance, calculate means, and plot mean bubbles per minute against distance.
Safety
Keep electrical equipment dry and avoid touching a hot lamp during the practical.
This format is easy to mark because the aim, materials, method, and recording points are visible. It also helps separate the procedure from the results and discussion.
Format 2: Research-lab SOP style
Use this when the method needs version control, handoff, and repeat use across people or teams.
Title
DNA extraction from cultured cells using silica spin columns
Document control
Version, effective date, author, reviewer, approved by.
Purpose and scope
Describe extraction of genomic DNA from cultured mammalian cells for downstream PCR.
Materials and equipment
List reagents, catalog-sensitive items, instrument models, tube types, and storage conditions.
Pre-run setup
Warm elution buffer to stated temperature, label tubes, prepare ethanol-containing wash solution, confirm centrifuge rotor compatibility.
Procedure
Numbered steps with exact volumes, speeds, durations, and hold points.
Required records
Sample IDs, lot numbers where required, deviations, yield, A260/A280 values, storage location.
Exceptions and deviations
What to do if pellet size is abnormal, column clogs, or elution volume changes.
References
Source kit manual, internal validation notes, linked forms.
Students should borrow the discipline of the SOP format even when a class report only asks for a method section. Adding setup conditions, labels, and recording points usually makes a practical procedure much stronger without making it bloated.
From Blank Page to Actionable Steps
Most bad procedures come from one habit. The writer assumes too much.
They know the assay well, so they skip the setup details, compress routine actions, and replace exact instructions with shorthand. Then someone else tries to run the method and fills the gaps with their own assumptions.

Write what the hands actually do
If you are starting from a blank page, draft the procedure in the same order the experiment will happen. This workflow works for both a practical report and a bench protocol:
- State the experiment goal. Write one sentence that defines what is being measured, compared, or produced.
- List variables and materials. Identify the independent variable, dependent variable, controls, reagents, equipment, and sample labels.
- Write the setup before the action. Include preheating, labeling, calibration, pre-chilling, tube arrangement, and starting conditions before the first numbered step.
- Convert bench actions into numbered instructions. One action per step is usually best.
- Add exact quantities, times, and settings. Volumes, concentrations, temperature, rpm, wavelength, duration, and order of addition belong in the steps.
- Add observation points. Say what must be recorded during the run, not just at the end.
- End with result handling. Include calculations, graphing, normalization, or pass/fail criteria if the procedure requires them.
That sequence answers the step-by-step problem: not just how to format a procedure, but how to build one from nothing.
Weak wording hides variability. Strong wording removes it.
| Weak instruction | Better instruction |
|---|---|
| Add a small amount of buffer | Add 10 µL of lysis buffer to each sample tube |
| Spin down samples | Centrifuge samples at 10,000 × g for 2 minutes at room temperature |
| Incubate overnight | Incubate at 4°C for 16 hours |
| Wash as usual | Wash each well three times with 200 µL PBS for 30 seconds per wash |
Notice what changed. The better version tells the scientist exactly what action to take and what variables matter.
Here is a simple before-and-after example for a practical:
- Before: “Heat the solution, add indicator, and record what happens.”
- After: “Heat 50 mL of the solution in a water bath at 60°C for 5 minutes. Add 2 drops of phenolphthalein, swirl for 5 seconds, and record any colour change within 30 seconds of addition.”
The second version is reproducible because it fixes the quantity, temperature, timing, and observation point. This is the exact conversion that matters most: vague classroom shorthand turned into instructions another person can execute without guessing.
Write with simple sentences. Use precise terminology. Avoid jargon that only makes sense inside your lab unless you define it. If a step says “spin samples down,” include the actual instrument setting needed for replication. If a reagent matters, include its concentration and, when relevant, the model or product information that distinguishes it from substitutes.
Use review to catch missing steps
A key reason procedures stay vague is the expert’s curse. People who perform a task repeatedly stop seeing the hidden steps.
That’s why review matters. A common recommendation is to have someone who knows the task, but is not an expert in it, write the protocol, and then have an expert review it for accuracy.
That advice matches what works in practice. To validate a new procedure, it helps to run it by fellow scientists, especially someone close enough to understand the technique but far enough away to notice every undocumented jump.
Use this review checklist:
- Can the reviewer identify setup dependencies before the first active step?
- Can they follow the sequence without asking verbal questions?
- Do they know what to record while running the experiment?
- Can they spot where a deviation should be documented?
- Would they make the same reagent and instrument choices you intended?
The right reviewer doesn’t just confirm that the science is correct. They expose where the writing assumes too much.
One last point. Map the experiment even if you expect the first run to fail. A failed experiment with complete procedural documentation is still productive. You can inspect the flow, compare deviations, and adjust the next version on purpose. A failed experiment with vague notes just burns time twice.
Advanced Procedure Writing and Management
Clear drafting gets you only part of the way. In a working lab, procedures also need control. People revise methods, swap reagents, discover edge cases, and adapt to equipment constraints. If you don’t manage that process, your “final” procedure becomes a pile of conflicting versions.
Put critical information where the action happens
Many writers still front-load safety and technical details in a separate warning section, then assume the reader will remember them later. That’s unreliable.
Guidance from Texas A&M on writing effective laboratory SOPs notes that users often skip introductory passages and overlook highlighted text, which is why hazards and technical specifications should be embedded directly within the relevant procedural step. The same guidance emphasizes that metadata such as author, keywords, and cross-references to reagents are essential for traceability.
So instead of writing this:
- Wear eye protection.
- Handle acid carefully.
Write this inside the step:
- Add the specified acid volume slowly to the tube while wearing eye protection and compatible gloves.
- Mix gently and keep the tube in the designated rack until neutralization or the next handling step.
That placement reduces missed warnings. It also keeps the instruction usable when someone is working quickly.
Good formatting doesn’t make a weak method strong, but it does make a strong method easier to follow under pressure.
A few formatting choices help immediately:
- Number major steps so deviations can be referenced precisely.
- Use consistent terminology throughout the document.
- Bold critical values sparingly when they are easy to miss.
- Keep alternatives limited unless the method explicitly supports them.
Treat procedures as controlled documents
Every procedure should carry basic metadata and revision logic.
At minimum, include:
| Metadata field | Why it matters |
|---|---|
| Author and reviewer | Establishes accountability |
| Effective date | Shows which version was active |
| Version number | Prevents parallel “almost final” copies |
| Purpose and scope | Clarifies intended use |
| Linked reagents or instruments | Supports traceability |
For versioning, simple is better. Use a controlled pattern such as v1.0 for the initial approved method, v1.1 for a minor clarification, and v2.0 for a material process change. Record what changed and why.
If the method comes from literature or a manual, cite that protocol rather than copying it carelessly into a local document. Rewriting established steps introduces transcription errors. Localize only what your lab has in fact changed.
In regulated settings, those habits support audit readiness. If you need a practical overview of compliance expectations for records and procedures, this guide on GxP documentation requirements is a useful companion read.
Common Procedure Writing Mistakes to Avoid
Most procedure failures are predictable. You can spot them before the experiment starts if you know what to look for.
A quick self-audit table
Use this table as a pre-run review. If your draft contains any of these patterns, fix them before someone uses it at the bench.
| Common Mistake | Why It's a Problem | How to Fix It |
|---|---|---|
| Ambiguous time language such as “briefly” or “overnight” | Different scientists will interpret the same word differently | Replace vague wording with a defined duration or approved time window |
| Missing reagent concentration | The same reagent name may exist in multiple working strengths | State the exact concentration in the procedure step |
| Listing materials separately but not in context | The scientist may not know when or where a specific item is used | Integrate materials and technical details into the relevant steps |
| Passive shorthand such as “samples were prepared” | Hides who did what and often hides missing detail | Write the action directly so the operator knows what to do |
| Omitting instrument settings | Replication fails when speed, temperature, or configuration differs | Include the setting that materially affects the outcome |
| Failing to document deviations | The final record no longer matches what actually happened | Add deviations at the time they occur, with enough context to interpret results |
| Assuming prior lab knowledge | New students and cross-trained staff fill gaps differently | Write for a competent scientist who is not already inside your routine |
| Too many options inside one method | Decision overload increases inconsistency | Standardize the default path and note exceptions only when necessary |
| Mixing method with results | The reader can no longer tell what was planned versus what was observed | Keep procedure steps separate from observations, data tables, and interpretation |
| Omitting apparatus details or sample labels | The method becomes hard to set up and samples become easy to confuse | Name equipment, tube types, and sample IDs before the run starts |
| Leaving out controls or setup conditions | Results cannot be interpreted or compared fairly | State control groups, starting temperatures, volumes, and baseline settings explicitly |
| Bundling multiple actions into one long sentence | Readers miss sequence and perform steps in the wrong order | Split into numbered actions, ideally one bench action per step |
Here are a few before-and-after rewrites that fix common problems fast:
- Before: “Prepare samples and run gel.”
After: “Prepare each sample using the stated buffer composition and loading volume, then load the specified volume onto the gel under the defined run conditions.” - Before: “Record results if needed.”
After: “Record band intensity observations, run anomalies, and any deviation from planned timing at the time of observation.” - Before: “Use standard wash conditions.”
After: “Wash with the named buffer using the defined wash sequence documented for this method.”
These mistakes matter more than they look, especially in student practicals. A method that mixes procedure with results can earn poor marks because the examiner cannot tell whether the student understands the difference between what was done and what was found. In bench science, the same confusion makes troubleshooting harder because the record stops being chronological.
A recurring practical problem appears when steps are bundled too tightly. A line such as “label tubes, add samples, centrifuge, decant, and resuspend” looks efficient on the page, but it is hard to execute without missing labels, reversing sample order, or forgetting what should have been recorded between actions. Clear separation improves reproducibility, which is one reason method-writing guides such as the University of Toronto’s lab report advice stress precise, ordered description of what was done.
The general rule is simple. If a step contains a term that depends on memory, custom, or local habit, rewrite it.
Beyond Paper Notes Capturing Your Procedure with an ELN
A clean procedure on paper can still fail during live work.
That happens when the experiment turns adaptive. You start with one plan, but a reagent behaves differently than expected, an incubation runs longer, an instrument queue delays the next step, or two related experiments overlap and force you to record events out of sequence.
Why static notes break during real experiments
Traditional procedure guides don’t handle this well. As noted by Norfolk State University’s discussion of lab report writing gaps, standard guidance often fails to address non-linear, exploratory experiments where researchers need to add context out of sequence or adjust methods mid-experiment.
That gap shows up in everyday bench work:
- You revise a step mid-run but only document the final version later.
- You observe something important during an incubation and forget the exact time by the time you sit down.
- You bounce between sections such as procedure, observations, and results, but your notebook format assumes a fixed order.
- Your gloves are on and hands are busy, so documentation gets delayed until memory becomes the source.
Paper notebooks are still valuable, but delayed entry weakens the record. A rigid ELN template can create a different problem. It may force the experiment into a neat sequence that doesn’t match reality.
What contemporaneous capture changes
The practical answer is contemporaneous capture. Record what you did when you did it, including changes, timings, and observations as they happen.
That’s especially useful for:
- Timed assays where incubation length changes the outcome
- Exploratory work where the method evolves during execution
- Regulated environments where timestamped records matter
- IP-sensitive work where sequence and timing can matter later
A flexible electronic workflow helps if it lets you capture notes in sections without locking you into one order. You may need to return to procedure after recording observations, then jump back to results later. Good documentation supports that reality instead of fighting it.
The broader shift toward digital record keeping is not just anecdotal. One 2023 estimate discussed in the scientific literature valued the ELN market at USD 659.8 million and projected growth to USD 966.2 million by 2030, reflecting steady demand for better research documentation workflows, as summarized in this ELN market review. Market size is not proof of good science, but it is a useful signal that labs increasingly see procedure capture as operational, not optional.
If you’re refining your workflow, this article on electronic lab notebook best practices is worth reading alongside your SOP process.
The best documentation system is the one scientists can actually use at the bench, in real time, without relying on memory to fill the gaps later.
What matters most isn’t whether the record starts on paper or screen. It’s whether the procedure, deviations, and observations are captured while they’re still true.
Making Every Experiment Count
A well-written procedure saves more than time. It protects the meaning of the experiment.
When the method is clear, another scientist can repeat it. When the record is contemporaneous, you can defend what happened. When a run fails, you still have something valuable. You can inspect the sequence, find the deviation, and improve the next draft instead of guessing.
That’s the core point of procedure writing. It isn’t bureaucracy. It’s how scientists turn one attempt into durable knowledge. Strong documentation is part of the experiment itself. For a broader view of why that matters, this piece on laboratory data integrity is worth keeping in your reading stack.
Frequently Asked Questions
| Question | Answer |
|---|---|
| What is the procedure of an experiment? | The procedure is the ordered method used to carry out the experiment. It explains the setup, materials, actions, measurements, and recording points. It is not the results, and it is not the discussion of why the results matter. |
| How do you write a procedure for an experiment? | Start with the aim, then list materials, setup conditions, and numbered steps in the order they are performed. Add exact quantities, times, temperatures, and settings. Finish with what must be observed or calculated so another person can repeat the experiment without guessing. |
| How do you write a procedure step-by-step? | Write the experiment in execution order: define the goal, identify variables and materials, describe setup, turn each bench action into a numbered step, add exact values, and state what to record during the run. A good check is whether someone else could follow it without asking you what comes next. |
| How do you write practical step-by-step? | For a school or university practical, use a simple sequence: aim, apparatus/materials, setup, numbered method, observations, calculations, and safety where relevant. For example, in a titration practical, include the volume pipetted, the concentration used, when the indicator is added, how readings are recorded, and how the mean titre is calculated. |
| What is the difference between procedure and results in a lab report? | The procedure says what you did. The results show what happened. “Add 25.0 mL acid and titrate with 0.100 M base” is procedure. “The mean titre was 24.65 mL” is a result. Keeping them separate makes the report easier to mark and the experiment easier to reproduce. |
| How much detail should a lab procedure include? | Include enough detail that another competent scientist can execute the method without guessing. Reagents should be measured accurately, the flow of steps should be explicit, and anything that affects interpretation should be documented. Leave out filler, but don’t leave out decisions the reader would otherwise have to infer. |
| What’s the best way to check whether a new procedure is clear? | Run it by fellow scientists before treating it as final. The best reviewer is often someone who understands the technique but didn’t write the method. They’ll catch skipped setup steps, unclear wording, and assumptions hidden by routine. |
| Should I write procedures before or after running the experiment? | Draft before the run so the experimental flow is fully mapped out, then update during and immediately after execution to reflect what actually happened. A procedure that only records the intended plan is incomplete if the experiment changed in practice. |
| How should I handle deviations from the written procedure? | Record them at the time they occur. Note what changed, when it changed, and why if known. Don’t silently edit the method after the fact to make the experiment look cleaner than it was. |
| Is a failed experiment still useful if the procedure was documented well? | Yes. A failed experiment with clear procedural notes is often more useful than a successful experiment with weak documentation. You can troubleshoot sequence, timing, reagent handling, and deviations, then use that information to plan the next iteration. |
If you want a practical way to capture procedures, deviations, observations, and timed steps while you’re still at the bench, a voice lab notebook like Verbex is built for that exact job. It lets scientists record experiment notes by voice, structures them into ELN sections, timestamps each entry, auto-documents timer events, and keeps processing on-device so no data leaves the iPhone. For labs that care about contemporaneous records, IP protection, and cleaner bench documentation, it’s a focused tool worth trying.