 Blog
Blog
C1V1 Calculator: How to Use It Step by Step
A timer is running, a protocol calls for a working solution, and the stock bottle shows a concentration in different units from the target. A C1V1 calculator can return the stock volume quickly, but a correct bench preparation requires more than accepting the displayed answer. The researcher also needs matching units, a practical pipetting volume, the right final-volume interpretation, and a record of what was prepared.
The central relationship is C₁V₁ = C₂V₂. It works when the solute is conserved and the volume assumptions are suitable for the solution. The workflow below treats the calculator as a bench decision tool, pairing the arithmetic with feasibility checks, dilution planning, and record-ready documentation.
By Multimod Labs.
Table of Contents
- What a C1V1 Calculator Does at the Bench
- The C1V1 Equals C2V2 Relationship in Plain Language
- Entering Values in a C1V1 Calculator the Right Way
- Worked Examples Across Volumes and Concentration Types
- When C1V1 Stops Being a Good Approximation
- Serial Dilution Planning and Pipette Feasibility
- Common Pitfalls, Verification Steps, and Bench Checklist
What a C1V1 Calculator Does at the Bench
Suppose a researcher has a 1 M stock and needs 10 mL of a 50 mM working solution. The calculator identifies the unknown stock volume, then shows how much diluent is needed to reach the final volume. The result is 0.5 mL of stock plus 9.5 mL of diluent, because the stock and target concentrations must first be expressed in the same units. This follows the conservation-of-solute relationship described in the dilution calculator reference.
The calculator is useful because it turns a concentration-and-volume question into a preparation decision:
- Stock volume: the amount transferred from the concentrated solution.
- Diluent volume: the amount needed after accounting for the stock aliquot.
- Final volume: the total volume after dilution, not merely the solvent added.
- Verification: a way to check that the calculated transfer reproduces the requested concentration.
Bench rule: The final volume is the volume of the complete mixture. It isn't the volume of diluent added to the stock.
A C1V1 calculator doesn't weigh solids, convert percent weight per volume into molarity, or correct for solvent density. It also doesn't decide whether an acid, organic solvent, viscous reagent, or concentrated buffer can safely be handled with simple volume arithmetic. Those decisions remain with the researcher and the laboratory procedure.
For bench documentation, Verbex: Voice Lab Notebook (iPhone and iPad app) can capture typed notes, voice notes, timers, and photos on an iPhone or iPad, then organize them into a structured record for review and export to PDF, Word, or Markdown. It operates on-device, requires no account, and uses no cloud service.
The useful mental model is simple: the calculator solves the equation, while the researcher confirms the units, checks the pipette range, considers whether a serial dilution is better, and records the preparation clearly.
The C1V1 Equals C2V2 Relationship in Plain Language
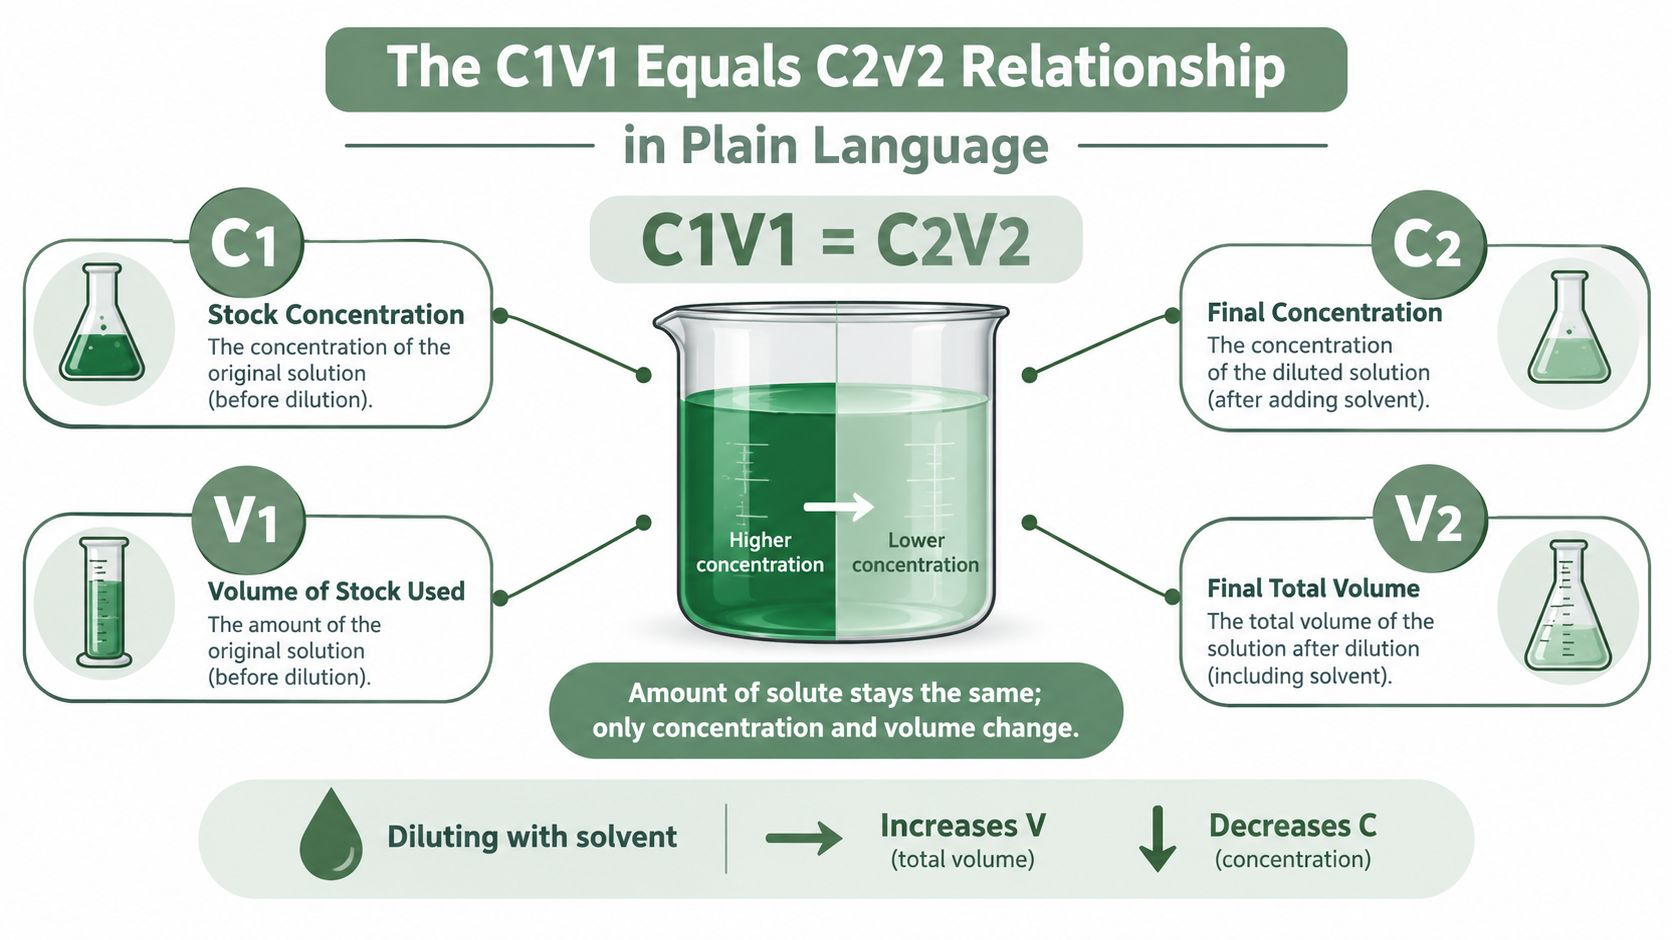
The equation C₁V₁ = C₂V₂ says that the amount of solute stays the same during an ordinary dilution. Adding solvent increases the total volume, so the concentration decreases, but the amount of solute does not change.
- C₁ is the starting, or stock, concentration.
- V₁ is the volume taken from the stock.
- C₂ is the desired final concentration.
- V₂ is the total final volume after dilution.
The calculator needs any three variables and solves for the fourth. The most common bench calculation is:
V₁ = C₂V₂ ÷ C₁
If the unknown is the stock concentration, the rearrangement is:
C₁ = C₂V₂ ÷ V₁
If the unknown is the final volume, the rearrangement is:
V₂ = C₁V₁ ÷ C₂
The dilution-factor form expresses the same relationship:
C₁ ÷ C₂ = V₂ ÷ V₁
A tenfold dilution means the final concentration is one-tenth of the stock concentration and the total volume is ten times the transferred stock volume. For instance, 1 mL of stock plus 9 mL of diluent produces 10 mL total, as described in the C1V1 equals C2V2 calculator resource.
A worked example makes the structure visible. To prepare 25 mL of 200 µM solution from a 10 mM stock, the concentrations must be expressed consistently. Since 10 mM equals 10,000 µM, the calculation is V₁ = (200 µM × 25 mL) ÷ 10,000 µM = 0.5 mL. The preparation therefore uses 0.5 mL of stock and 24.5 mL of diluent.
The equation assumes that the solute is conserved and that the volume behavior is sufficiently close to additive for the preparation. That assumption is reasonable for many dilute aqueous solutions, but it needs scrutiny for concentrated or chemically non-ideal mixtures.
Entering Values in a C1V1 Calculator the Right Way
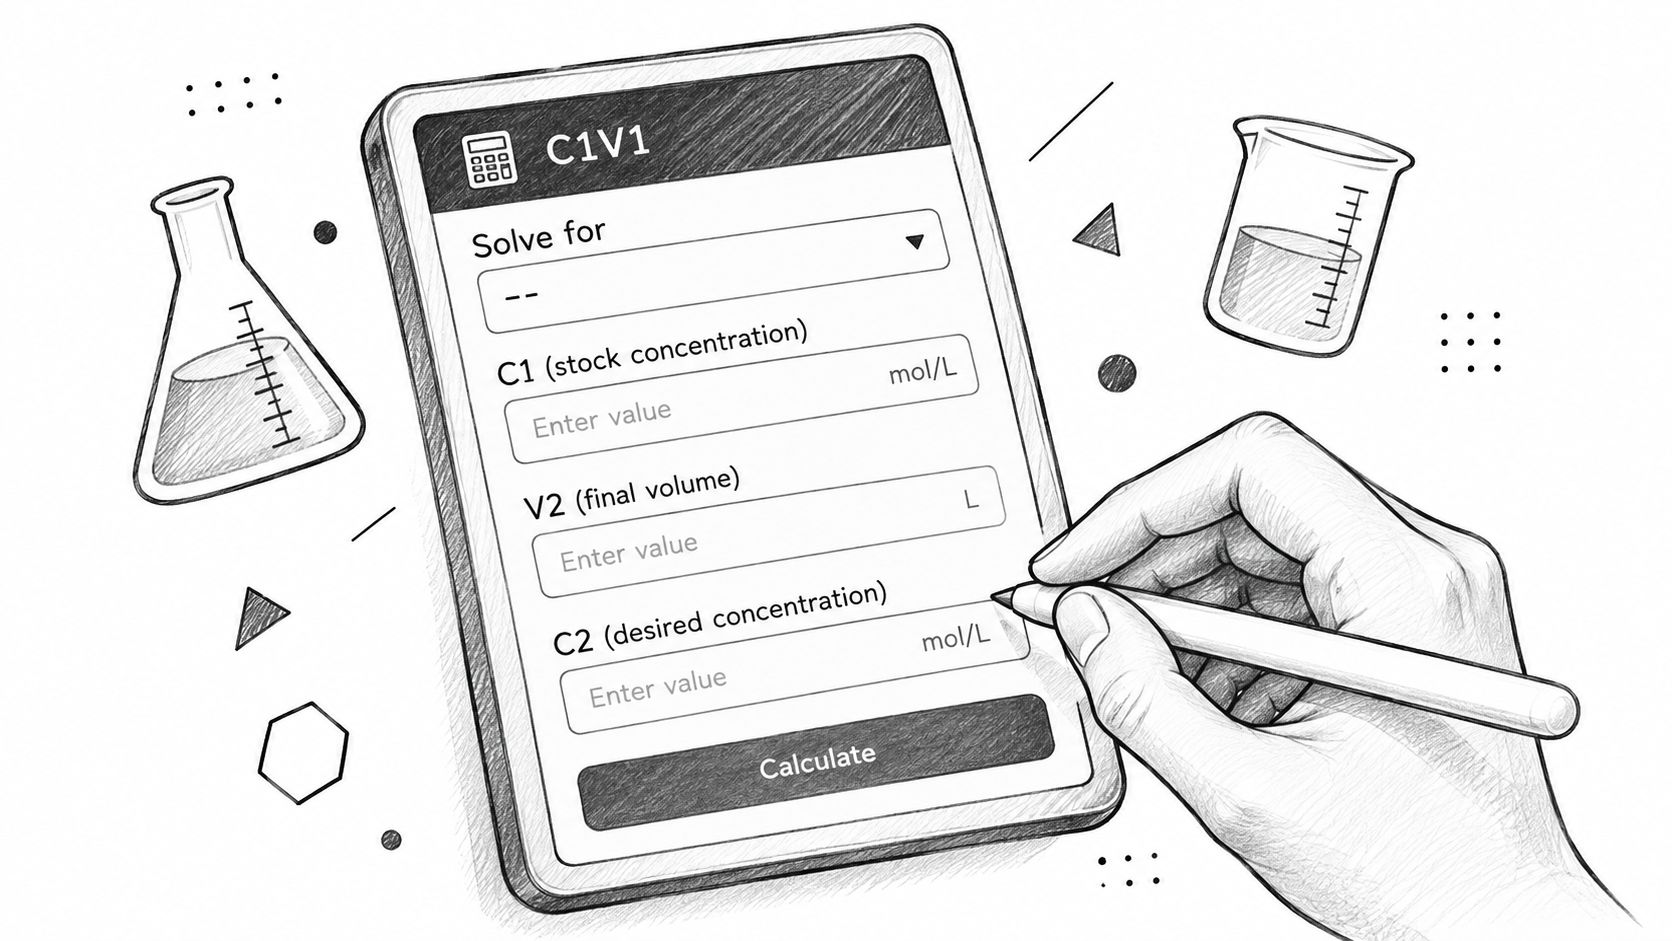
At the bench, an incorrect field choice can turn a sound dilution plan into a bad pipetting instruction. Set up the calculator in the same order you would prepare the tube: identify the unknown, standardize units, enter the concentrations, then enter the final volume.
Select the unknown first
For a routine working-solution preparation, choose V₁, the volume of stock to transfer. Enter the known stock concentration, target concentration, and final total volume in their matching fields. If the calculator is solving for C₁, C₂, or V₂, select that variable before entering the other values so the displayed result answers the actual bench question.
Unit matching comes before arithmetic. A preparation from 2 M stock to 50 mM target requires either converting the target to 0.050 M or converting the stock to 2,000 mM. Both choices describe the same concentrations. Entering 2 M and 50 mM as though they shared a unit gives the calculator incompatible inputs.
Volume fields follow the same rule. Pair mL with mL or µL with µL. A unit selector may perform conversions, but read the selected unit beside every value. A calculator can convert a number; it cannot recognize that a value was entered in the wrong field.
Enter like with like
Use this entry sequence:
- Choose the solve mode, such as V₁, C₁, C₂, or V₂.
- Set one concentration unit across both concentration fields, such as mM.
- Set one volume unit across the volume fields, such as mL.
- Enter the stock concentration, target concentration, and final total volume.
- Check that the target concentration is lower than the stock concentration for a dilution.
- Calculate V₁, then compare the result with the pipette range available at the bench. A volume that is mathematically correct may still be impractical to transfer accurately. Change the final preparation size or plan an intermediate dilution if needed.
The Molarity Calculator can convert mass-based reagent information into molarity before those values enter the C1V1 workflow. Keep the calculator output as a planning value, then round only to a volume your selected pipette can deliver.
Worked Examples Across Volumes and Concentration Types
The same equation behaves consistently across small assays and larger preparations, but the practical risks change with scale. The examples below are illustrative calculations based on the conservation relationship. The molarity and dilution calculation guidance also emphasizes that the final volume means the complete mixture after dilution.
Small assay volume
A researcher needs 1 mL of 200 µM compound from a 10 mM stock. Since 10 mM equals 10,000 µM, the stock volume is:
V₁ = (200 µM × 1 mL) ÷ 10,000 µM = 0.02 mL
That equals 20 µL of stock, followed by 980 µL of diluent. The mental check is that 200 µM is one-fiftieth of 10,000 µM, so the stock should represent one-fiftieth of the final volume.
The common trap is entering 1 mL as the final volume while entering the stock volume in µL without conversion. The equation doesn't know that the units differ.
Larger buffer preparation
For 250 mL from a 100 mM stock to 5 mM, the stock volume is:
V₁ = (5 mM × 250 mL) ÷ 100 mM = 12.5 mL
The diluent brings the mixture to 250 mL total, so the required diluent volume is 237.5 mL, assuming the ordinary dilution approximation is appropriate. The ratio check is useful: the stock is twenty times more concentrated than the target, so the stock should occupy one-twentieth of the final volume.
Percent weight per volume
A preparation calling for 5% w/v from 30% w/v in 500 mL can use the same algebra because both concentrations use the same type of unit:
V₁ = (5% × 500 mL) ÷ 30%
The result is 83.3 mL of the 30% stock, with diluent added to reach the final volume of 500 mL. Percent values must remain percent values on both sides. They shouldn't be mixed with molarity, mg/mL, or another concentration basis unless a valid conversion has been completed first.
Mass concentration and molarity
A stock specified in mg/mL cannot be blended directly with a target specified in mM. The molar mass of the solute is required for conversion. Once both concentrations are expressed in a common unit, the C1V1 calculation can proceed normally.
| Scenario | C₁ | C₂ | V₂ | V₁ stock | Diluent | Check |
|---|---|---|---|---|---|---|
| Small assay | 10 mM | 200 µM | 1 mL | 20 µL | 980 µL | Target is one-fiftieth of stock |
| Buffer preparation | 100 mM | 5 mM | 250 mL | 12.5 mL | 237.5 mL | Stock is one-twentieth of final volume |
| Percent preparation | 30% w/v | 5% w/v | 500 mL | 83.3 mL | 416.7 mL | Same concentration basis |
| Serial-dilution planning | Stock and target in matched units | Lower target | Final volume selected by protocol | Solve with C₂V₂ ÷ C₁ | V₂ − V₁ | Check each step separately |
For repeated dilution steps, a serial dilution calculation guide helps separate the overall dilution factor from the volume used in each individual tube.
When C1V1 Stops Being a Good Approximation
C1V1 arithmetic becomes less dependable when mixing changes the physical behavior of the solution. The equation assumes conservation of solute and effectively additive volumes. That approximation is often reasonable for dilute aqueous solutions, but it can fail for concentrated solutions or mixtures with substantially different solvent properties, as discussed in the solution dilution limitations reference.
Concentrated acids, organic-solvent mixtures, glycerol-containing buffers, and viscous reagents deserve additional caution. Heat generation, density changes, volume contraction, solvent compatibility, and a final volume that shifts after mixing can all make a precise-looking calculator result misleading.
Practical decision: The question isn't only “what volume should be pipetted?” It is also “can this preparation be treated as an ordinary volumetric dilution?”
Three preparation categories help:
- Ordinary aqueous dilution: C1V1 may be suitable when the solution is dilute, compatible, and close to volume-additive.
- Final-volume adjustment: A volumetric flask may be more appropriate when accuracy depends on reaching a calibrated final volume rather than adding a calculated solvent volume.
- Non-ideal or hazardous mixture: Density-based preparation, controlled cooling, gravimetric measurement, titration, or another validated method may be needed.
Temperature can matter as well. Volumetric equipment is calibrated at a specified temperature, while solutions may be prepared or used at another temperature. When density, heat, contraction, or solvent behavior matters, the calculator should be treated as an initial estimate rather than the complete method.
Serial Dilution Planning and Pipette Feasibility
A mathematically correct stock volume can still be a poor bench instruction if the aliquot is too small for the selected pipette. A serial dilution solves that operational problem by distributing the total dilution across intermediate solutions.
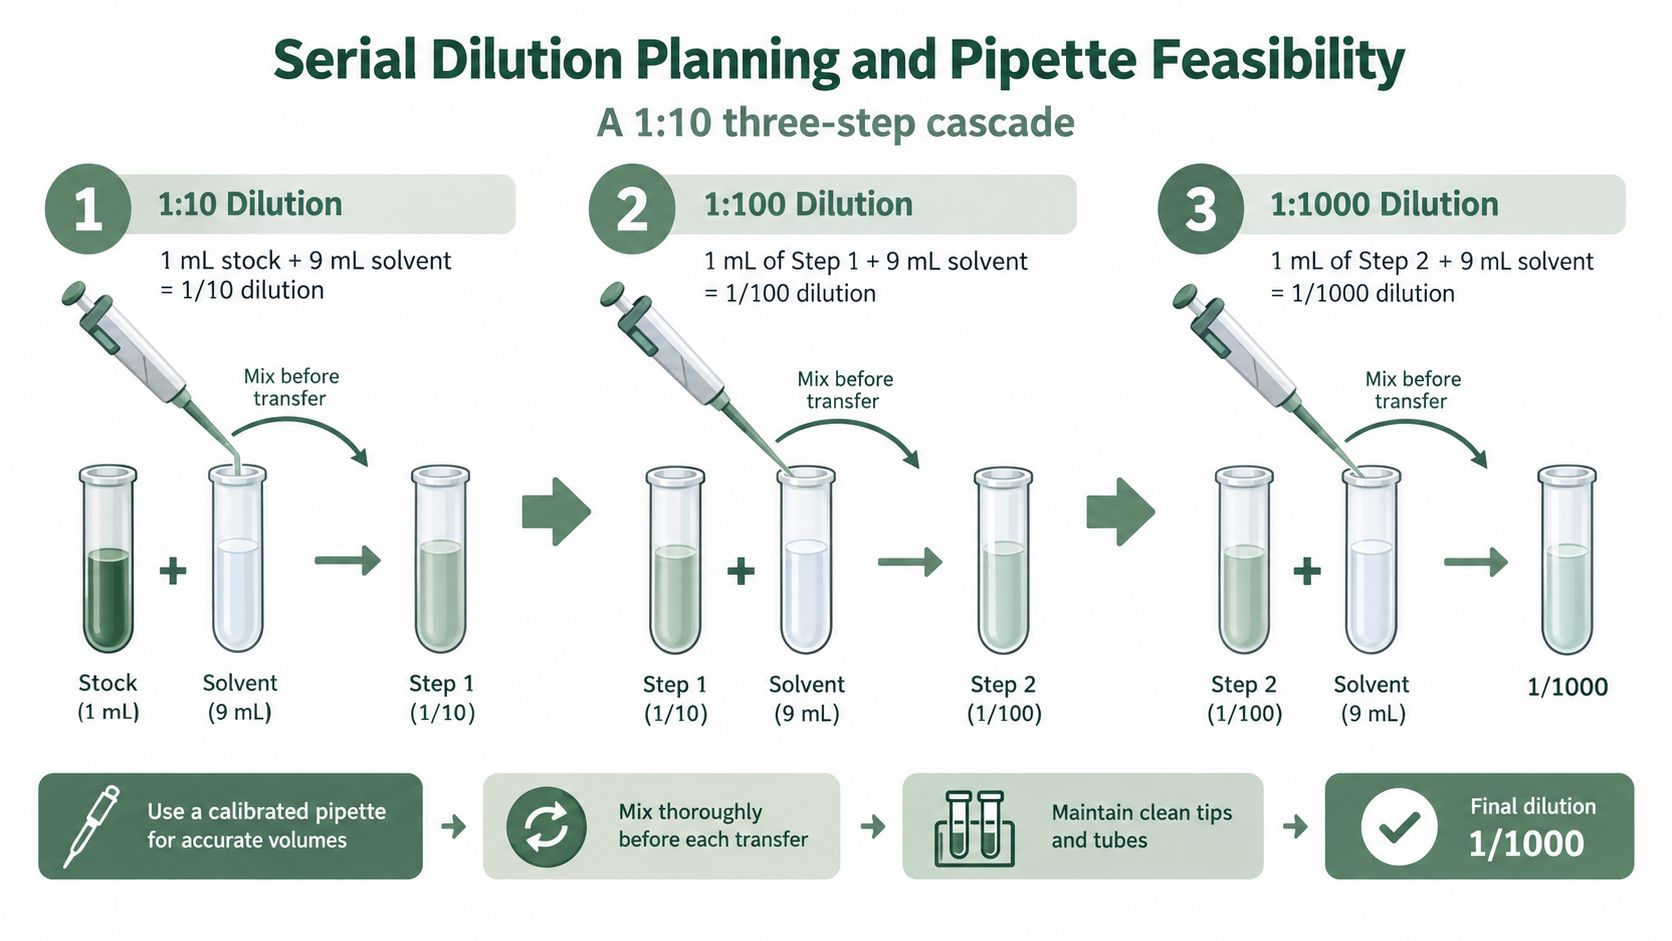
A three-step 1:10 cascade produces an overall 1:1000 dilution. Each tube must be mixed thoroughly before the next transfer, because the next concentration depends on the intermediate being uniform.
A practical sequence is:
- Combine 1 mL of stock with 9 mL of solvent for a 1:10 dilution.
- Mix the first tube, then transfer 1 mL into 9 mL of solvent for a 1:100 dilution.
- Mix the second tube, then transfer 1 mL into 9 mL of solvent for a 1:1000 dilution.
The Serial Dilution Calculator can help map each intermediate concentration and volume before liquid handling begins.
A working-stock strategy is useful when the primary stock is highly concentrated or expensive. If a direct calculation returns 0.7 µL, the researcher can prepare an intermediate stock and choose a transfer volume that the available pipette can measure more reliably. The intermediate concentration must then be recalculated from the actual rounded volumes, rather than assumed to equal the ideal value.
The same principle applies when a researcher plans to transfer 1 µL instead of a smaller calculated volume. The preparation record should state the intermediate concentration, actual aliquot, diluent volume, and resulting final concentration. Each extra transfer introduces another opportunity for measurement error, so serial dilution should reduce impractical aliquots without creating unnecessary steps.
Record the actual transfer, not only the intended transfer. A later reader needs the volumes that entered the tube, the stock identity, the diluent, the final volume, and any rounding decision.
Common Pitfalls, Verification Steps, and Bench Checklist
A dilution can look correct on paper and still fail at the bench. Common causes include entering molarity beside percent w/v, swapping stock and target concentrations, or selecting a pipette that cannot measure the calculated aliquot accurately. Treat the calculation as a workflow check, not only an algebra exercise.
| Pitfall | Verification move |
|---|---|
| Concentration units differ | Convert both concentrations to compatible units before calculating |
| Stock and target are reversed | Confirm that C₁ is greater than C₂ for an ordinary dilution |
| Final volume is confused with diluent volume | Use V₂ as the total mixture volume, then calculate diluent as V₂ minus V₁ |
| Calculated aliquot is impractical | Compare V₁ with the selected pipette's working range |
| Rounded volume is used without recalculation | Recalculate the resulting concentration from the actual transfer |
| Concentrated or viscous solution is treated as ideal | Check density, heat, contraction, compatibility, and final-volume requirements |
| The preparation cannot be reconstructed | Record the material identity, actual volumes, timing, observations, and deviations |
Use the equation as a plausibility check. The stock fraction of the final mixture should match the dilution factor, and a more concentrated stock should normally require a smaller stock volume. A result in which the target concentration exceeds the stock concentration signals that the setup is not an ordinary dilution.
Before liquid handling, run this bench checklist:
- Units: Confirm that concentration and volume units are compatible.
- Pipette: Check that the planned transfer sits within the instrument's stated working range.
- Volume: Distinguish total final volume from the amount of solvent added.
- Rounding: If the transfer changes, calculate the achieved concentration using the rounded value.
- Solution behavior: Look for viscosity, precipitation, heating, contraction, or incompatibility that could affect the ideal calculation.
- Mixing: Mix the preparation according to the procedure before taking a later aliquot.
- Record: Note observations and deviations while the work is happening, rather than relying on memory.
- Review: Have another researcher check an unusual result, impractical transfer, or nonstandard preparation.
The World Health Organization laboratory-quality guidance recommends records that contain enough information to repeat a test or recalculate its results. It also supports recording activities as they occur and documenting nonconformities and corrective actions.
A clear calculation, a feasible transfer, and a contemporaneous note give the next researcher a usable trail from formula to tube. Verbex can support that workflow with voice notes, typed notes, timers, and images on iPhone and iPad, then organize the material for review and export it as PDF, DOCX, or Markdown for an existing ELN.