 Blog
Contamination Prevention in the Lab: A Practical Guide
A negative control turns positive, the plate is already finished, and the notebook says only that the protocol was followed. Effective contamination prevention starts before that moment: block the likely routes, place controls where they can locate a failure, and record the handling details needed to decide what the result means. A clean-looking bench isn't enough if nobody can reconstruct which stock, transfer, or workspace introduced the unwanted material.
By Multimod Labs.
Table of Contents
- Where Contamination Gets In and How to Block It
- How to Work Aseptically at the Bench, Step by Step
- Designing a One-Way Workflow and Plate Layout
- Disinfectants and Inactivation You Can Validate
- Controls and What Their Patterns Tell You
- Recording Each Run and Starting Your Log This Week
Where Contamination Gets In and How to Block It
Contamination routes and the control that blocks each
| Route | How it gets in | Control that blocks it |
|---|---|---|
| Hands and gloves | Gloves touch benches, phones or notebooks and carry material to the next sample | Change gloves between samples and after touching non-sterile items |
| Aerosols and splashes | Forceful pipetting and open tubes release droplets that settle on nearby surfaces | Pipette gently, cap tubes, and use aerosol-barrier tips |
| Shared reagent stocks | A used tip dipped into a stock bottle carries material into every later draw | Aliquot reagents and keep working stocks separate |
| Benches and equipment | Residue builds up on surfaces, pipettes and centrifuges | Decontaminate on a set schedule with a validated agent |
| Neighboring wells | Overfilling, wicking, spills and long lid-open time move material between wells | Avoid maximum volumes, minimize lid-open time, and plan fill order |
| Samples themselves | High-load or positive specimens shed material into the workspace | Keep samples in leakproof primary containers and work in the designated area |
| Waste and used tips | Discarded consumables re-enter the workspace or get reused | Segregate waste at the bench and never reuse disposable gloves or tips |
| Earlier amplified product | Amplicons from previous runs become aerosols and reach new reactions | Analyze product in a separate post-amplification area |
Where does contamination come from? Usually, the useful answer is a transfer route, not a dirty object. An investigator needs to identify what carried material, where it went, and which action would have interrupted that movement.
The first control to strengthen follows the assay. For cell culture, glove handling and unobstructed hood airflow deserve close attention; for PCR, the separation between amplified product and reaction setup is critical. VirusFAQ.com's overview of safer handling practices for laboratory work offers a supplementary handling checklist, while the assay-specific procedure should govern the actual work.
Match the fix to the route
Consider a shared stock bottle touched by a used tip. Every later draw becomes suspect, even if the operator subsequently cleans the bench perfectly. Working aliquots limit the reach of that mistake; extra surface cleaning doesn't repair the stock.
Aliquoting has costs: more tubes, labeling, storage space, and preparation. The useful trade-off is containment of uncertainty. A questionable working aliquot can be isolated without automatically implicating every experiment using the original stock.
Plate contamination also extends beyond microbes. A study of volatile test substances and degradation products investigated effects on adjacent wells and evaluated breathable membranes combined with activated-carbon filters as mitigation. A plate can therefore give biased results without visible growth or obvious residue.
Practical rule: Choose the control that interrupts the transfer, not the cleaning step that's easiest to add.
Before the next session, the operator should circle the two routes most relevant to the last three experiments. Those selections become priorities for technique checks and documentation, rather than reasons to add every possible precaution indiscriminately.
How to Work Aseptically at the Bench, Step by Step
Aseptic technique works through deliberate movements and a prepared workspace. Gloves and a hood don't compensate for forceful dispensing, clutter, or repeated contact with non-sterile objects.
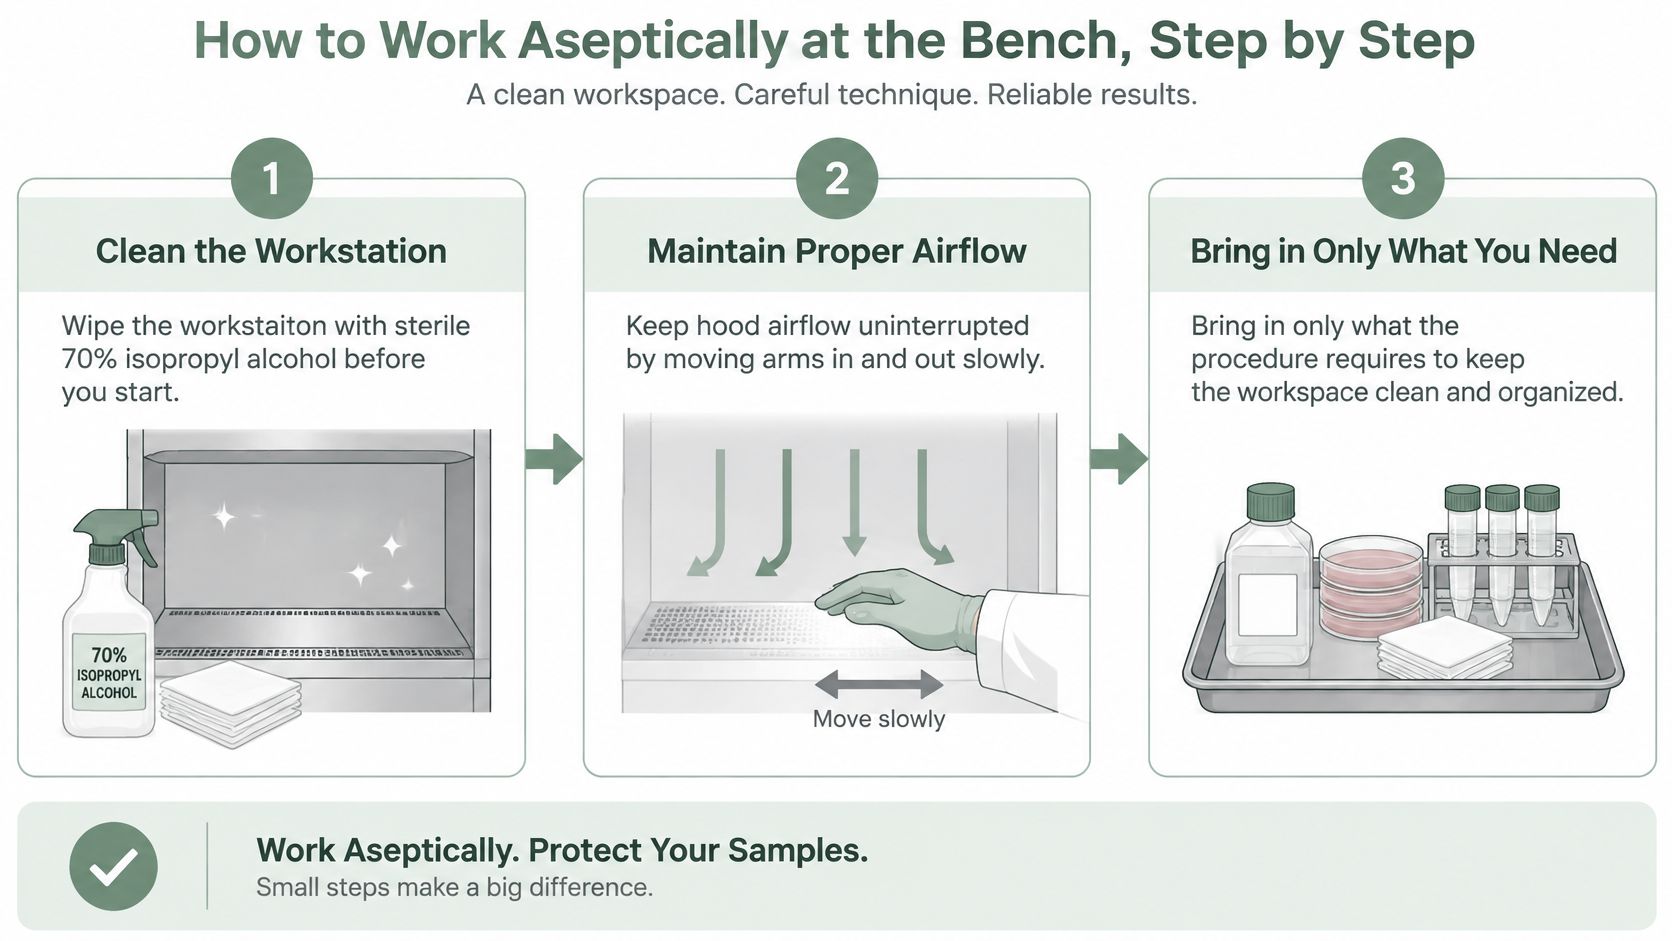
The following visual summarizes the workstation preparation sequence.
A routine for each session
Prepare the workstation. For a compatible laminar-flow aseptic workstation, wipe before starting with sterile 70% isopropyl alcohol, an example disinfectant in FDA aseptic-processing guidance, and preserve airflow by moving arms carefully rather than making abrupt sweeps. The common slip is treating a quick wipe as sufficient regardless of the target contaminant or required exposure time.
Bring in only the materials needed for the procedure, sanitizing non-sterile items before entry. Spare boxes, notebooks, and crowded racks consume working space and can interrupt clean handling paths; preparation outside the workstation reduces those interruptions.
Check clothing and gloves. Start with a clean laboratory coat and intact gloves, inspecting fingertips and cuffs for tears or holes. A damaged glove isn't rescued by another application of disinfectant, and continuing work leaves both sample protection and personal protection uncertain.
Pipette with the correct device and a suitable barrier tip, without forceful expulsion. The WHO Laboratory Biosafety Manual guidance on pipetting emphasizes training to minimize aerosols and splashes; a vigorous dispense can distribute material beyond the receiving tube and explain a later unexpected signal.
Sanitize or replace gloves at the appropriate transition. Change gloves between samples when required by the workflow, and after contact with a phone, notebook, or door handle before resuming clean work. The expensive mistake is continuing through the remaining samples because the gloves still look clean.
Keep tubes capped between transfers and open them only when needed. Leaving an entire rack open may make dispensing feel faster, but it also exposes unrelated tubes during every neighboring manipulation.
Finish without carrying contamination away. Remove gloves aseptically and wash hands after biological work. Touching a clean drawer, pen, or device before glove removal creates another transfer route outside the immediate experiment.
Keep equipment choices separate from technique
WHO laboratory guidance prohibits mouth pipetting, recommends cotton plugs for applicable pipetting devices, and calls for work areas free of unrelated materials. Cotton plugs in the specified device aren't a reason to omit suitable aerosol-barrier tips from a micropipette workflow.
For peptide experiments, Bulk Aussie Peptides lists supplies for research-use-only peptide studies. Any selected consumable still needs to match the assay's compatibility, sterility, and handling requirements; a supplier listing doesn't establish those properties for a particular experiment.
A clean session should also leave a usable record. Glove changes, splashes, and deviations from the intended dispensing method belong in the experimental log when they occur, not in a reconstruction after the result becomes questionable.
Designing a One-Way Workflow and Plate Layout
One-way movement is a layout decision, not a final cleaning step. The FDA-hosted assay instructions specify the sequence from reagent preparation through sample processing, extraction and template addition, amplification, and separate post-amplification analysis.
Work zones and the equipment each one needs
| Zone | Work done there | Dedicated equipment |
|---|---|---|
| Reagent preparation | Master mix, primers and enzyme aliquots prepared cold | Dedicated pipettes, tips, racks and tubes |
| Sample processing | Extraction and adding template to reactions | Separate pipettes, centrifuge and tips from preparation |
| Amplification | Thermal cycling with sealed plates or tubes | Closed instruments with no open handling of product |
| Post-amplification | Opening runs and analyzing amplified product | Own pipettes, gloves and bench, with no return to preparation |
The physical separation should be apparent before any tube opens.
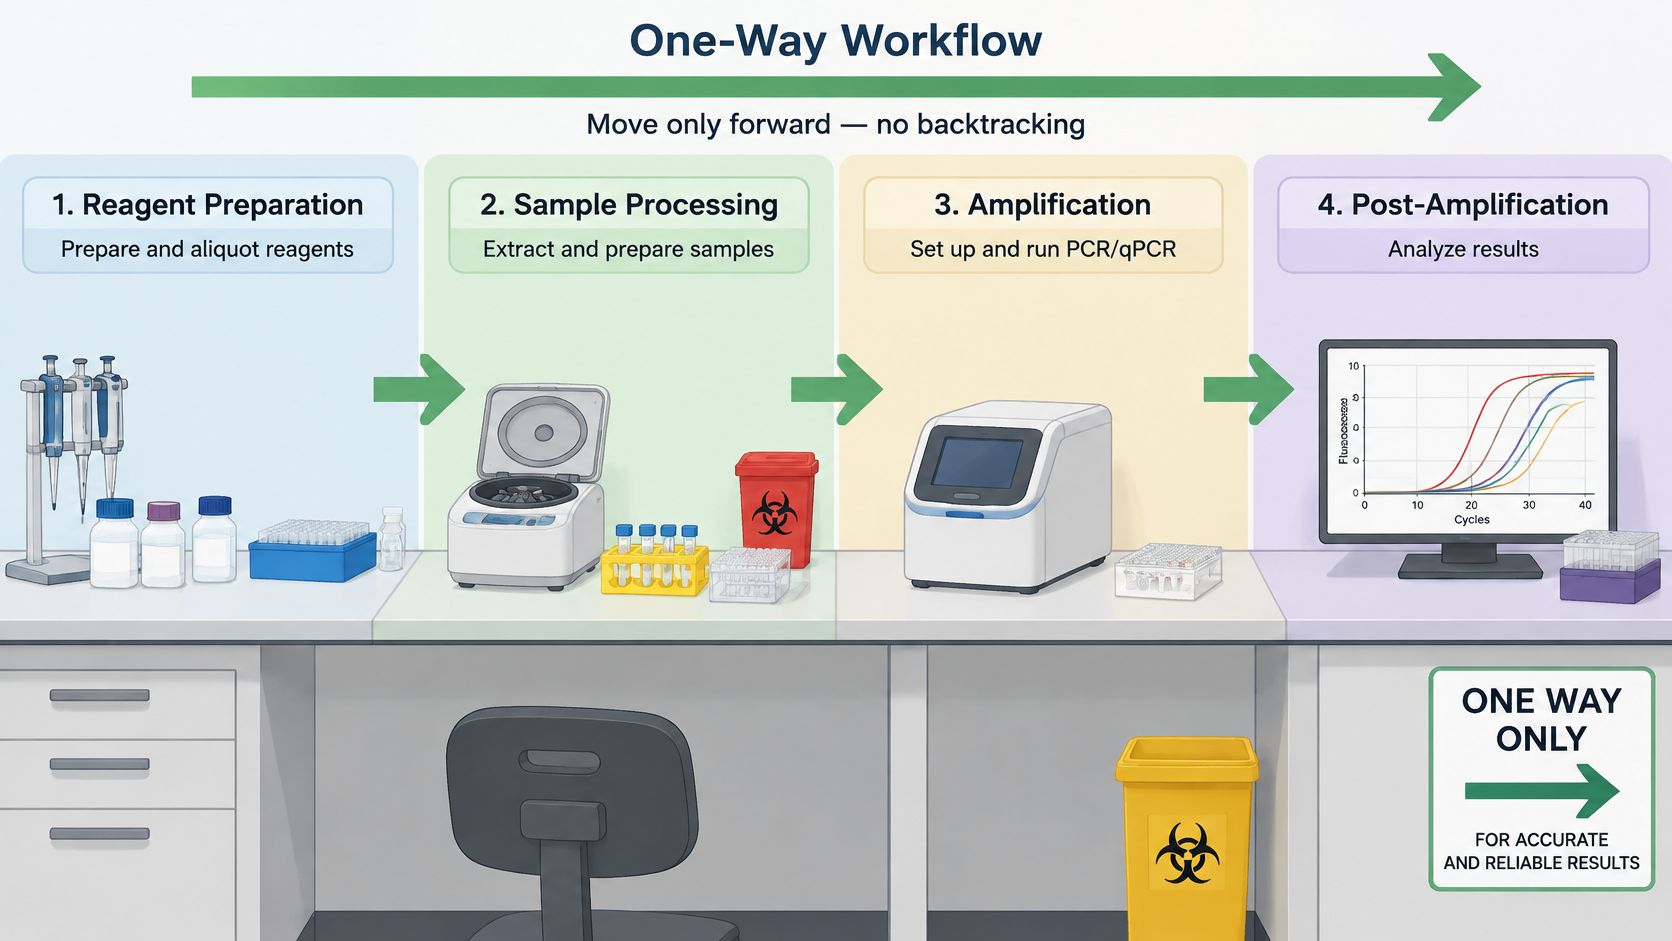
Use aerosol-barrier tips, replace tips after each manual transfer, and cap tubes between operations. Record reagent expiry and lot compatibility, and maintain temperature-sensitive setup reagents under the conditions specified for the assay.
Make restricted space explicit
In a single room, dedicated benches or suitable hoods and separated work periods can reduce opportunities for carryover, with cleaning between stages. They're not automatically equivalent to physical segregation, particularly when amplified products are opened nearby.
The movement principle also appears in pharmaceutical requirements. FDA aseptic-processing guidance discussing 21 CFR 211.42(b) addresses flow designed to prevent contamination and defined time limits for relevant processing stages; those manufacturing requirements shouldn't be presented as universal rules for every research laboratory.
For multiwell work, the layout should make contamination routes visible:
- Separate high loads from blanks. Avoid placing the strongest standards or positive samples beside critical negatives when practical.
- Use edge controls deliberately. When evaporation matters, selected edge controls can reveal positional effects; edge wells aren't protected locations.
- Preserve dispensing order. Record the sequence and seal-removal events alongside the layout, using an ELISA plate template where appropriate.
Suppose a researcher carries an analysis-bench pipette back to preparation while fetching a rack. The reverse transfer is a deviation requiring assessment, not merely an awkward movement to forget.
Every tube should have a traceable route from reagent preparation to readout without equipment traveling backward.
Disinfectants and Inactivation You Can Validate
Disinfectants used in contamination control
| Agent | Typical use | Notes |
|---|---|---|
| 10% bleach | Decontaminating benches and equipment in DNA-sensitive work | Follow with 70% ethanol to remove residue; use a validated contact time |
| 70% ethanol | Wiping surfaces after bleach and wiping suitable items before entry | Removes bleach residue; not a substitute for a validated agent against all targets |
| Sterile 70% isopropyl alcohol | Wiping non-sterile items entering a laminar-flow workstation | Example in FDA aseptic guidance; keep sterile and dated |
| Validated DNA-removal product | Nucleic-acid contamination on benches and equipment | Use at the manufacturer's validated concentration and contact time |
| Validated disinfectant for the target | Biological spills and specimen-contact surfaces | Concentration and contact time come from the validation record, not habit |
The DNA-sensitive cleaning sequence uses bleach or a validated DNA-removal product, followed by ethanol to remove bleach residue. Apply agents sequentially under the approved procedure, never by mixing them, and check equipment compatibility before treatment.
Alcohol alone isn't a universal answer for spores, viruses, or nucleic acids. Selection depends on the actual target and validated conditions, rather than the convenience of the bottle already on the bench.
Separate disinfection from specimen inactivation
A surface-cleaning procedure doesn't establish that a specimen is safe to transfer or handle at reduced containment. WHO biosafety guidance calls for validated inactivation, leakproof specimen containment, aerosol minimization, and appropriate end-of-work decontamination.
For chemical or thermal inactivation, the validation record should identify:
- Material and target: The specimen matrix and organism or material the treatment addresses.
- Exposure conditions: Chemical concentration or thermal conditions, contact time, and relevant loading conditions.
- Acceptance criteria: The evidence required before the treatment is considered effective.
- Actual execution: Operator, location, treatment timing, and deviations from validated conditions.
A concentration written on a bottle doesn't prove that a surface remained wet for the necessary time. Likewise, carrying an unsealed specimen between rooms isn't made acceptable by a plan to wipe the outside later.
Verify the routine at defined locations
At closeout, separate clean materials from contaminated waste, secure waste in suitable bags or boxes, and treat visibly contaminated surfaces using the validated procedure. Disposable gloves must not be reused.
Surface swabs or contact plates can assess microbial contamination at defined locations, consistent with FDA environmental-monitoring guidance. The sampling method must suit the target: microbial contact plates don't establish that amplifiable DNA has been removed.
Verification boundary: A satisfactory sample supports the cleaning assessment only for the location, time, target, and detection method actually tested.
The practical action is a disinfectant entry for each relevant surface type, including its agent, contact time, compatibility restrictions, and validation reference.
Controls and What Their Patterns Tell You
An extraction blank that turns positive while the no-template control stays negative makes extraction reagents and the extraction workspace reasonable starting points. It doesn't prove either is responsible, but it gives the investigation a narrower scope than an isolated failed end-point control.
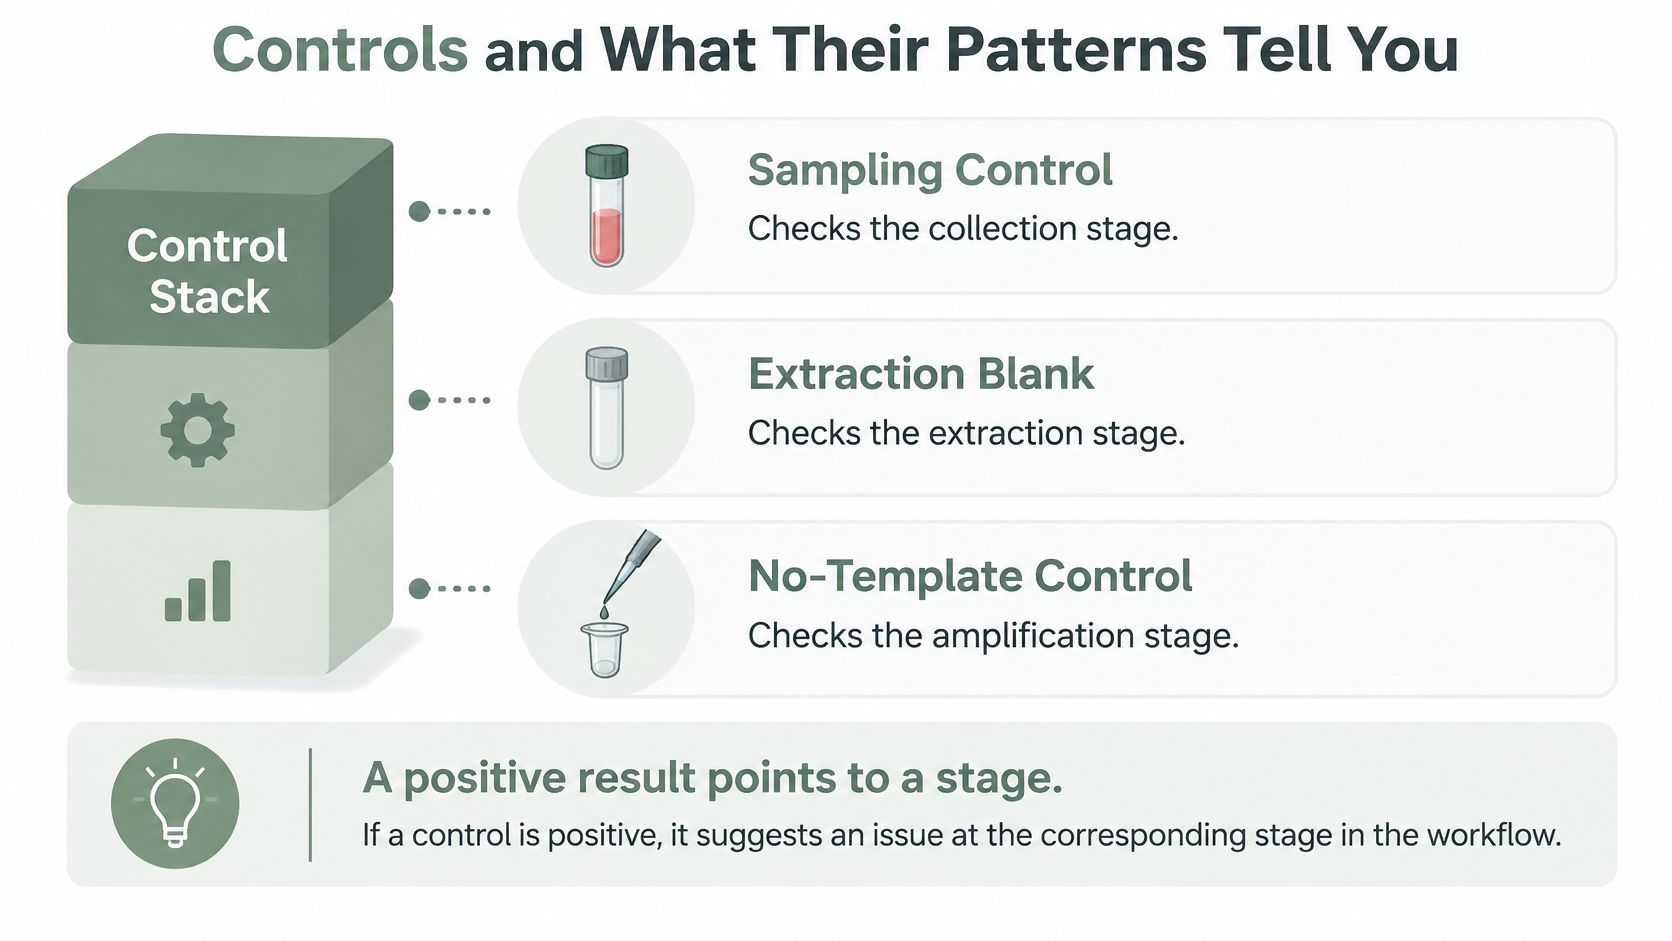
Place a sampling control, extraction blank, and no-template control at their respective workflow stages. A microbiology guideline published in 2025, DOI 10.1038/s41564-025-02035-2, recommends combining controls across processing stages to help identify contamination and its likely source.
The control stack makes the entry points explicit.
Control patterns, likely sources and next steps
| Observed pattern | Likely source | Next step |
|---|---|---|
| Only extraction blanks positive | Extraction reagents or extraction workspace | Check extraction reagent lots and repeat with fresh reagents |
| Only no-template controls positive | Master mix or setup reagents | Quarantine the implicated reagent lot pending investigation and prepare fresh aliquots |
| Samples positive, blanks clean | Genuine sample signal, or sample handling and carryover between specimens | Review handling records and glove changes before assigning contamination |
| Scattered wells positive across plate | Aerosols or splashes during setup | Review pipetting method and plate fill order |
| Edge wells distorted only | Evaporation or wicking at plate edges | Review seal timing, volumes and edge-well use |
| Every control and sample positive | Shared reagent stock or contaminated workspace | Stop interpretation, decontaminate, and check the stock before repeating |
Turn patterns into decisions
These patterns are starting hypotheses, not diagnoses. Positive samples with clean blanks may be entirely expected, and an isolated positive no-template control can arise from a local dispensing event rather than the whole reagent lot.
For an extraction-associated failure, hold interpretation of the affected extraction batch and repeat the relevant stage with fresh reagents and controls. If repeat testing implicates a shared lot, quarantine that lot and identify other potentially affected runs.
For a no-template-control failure, suspend interpretation of affected amplification results according to the assay's acceptance criteria. Fresh aliquots help test the reagent hypothesis, but replacing reagents without examining the workspace can leave the actual route untouched.
- Define the repeat scope: Specify whether the required repeat begins at sampling, extraction, or amplification.
- Name the hold: Identify affected specimens, runs, or reagent lots rather than writing only that contamination occurred.
- Preserve the evidence: Retain raw output, plate coordinates, operator details, and the original control results.
A PCR workflow guide can help organize the procedure, but batch acceptance must follow local validation. More controls don't improve an investigation if their positions can't distinguish competing explanations.
Recording Each Run and Starting Your Log This Week
On Thursday a negative control fails. Tuesday's voice note says a glove change was skipped after sample handling, but that note was never reviewed or attached to the run. The observation was captured. It never reached the decision about where the failure entered.
An investigator needs start and stop times, zone and bench, operator, reagent lot and expiry, glove changes, disinfectant and contact time, plate fill order, sampling locations, and deviations. Each field ties a result to the conditions that produced it, so a later review can name the route instead of only noting that contamination occurred.
A run sheet that supports reconstruction
| Run-sheet field | Entry needed |
|---|---|
| Run identity and operator | Assay, date, run identifier, operator and any handover |
| Workspace | Zone, bench or hood, and relevant equipment identifiers |
| Materials | Reagent identity, working aliquot, lot, expiry and preparation details |
| Timing | Exact start and stop times for time-sensitive stages, plus excursions |
| Handling transitions | Glove changes, interruptions, item transfers and unexpected contacts |
| Cleaning | Surface, agent, concentration, actual contact time and procedure reference |
| Plate handling | Layout version, fill order, sealing and reopening events |
| Monitoring and controls | Sampling locations, control positions, results and acceptance criteria |
| Deviations and observations | Splash, vigorous dispense, visible change, uncertainty and immediate action |
| Interpretation decision | Hold, repeat, release for analysis, reviewer and supporting evidence |
Separate observation from explanation. "Liquid splashed beside well C7" is evidence. "That splash caused the amplification" stays a hypothesis until the control pattern and the handling record support it.
Write a timed excursion when it happens. A later line that incubation was "about right" does not establish the duration, and it does not tell you whether the result is still interpretable.
Capture first, then review
Verbex for iPhone and iPad is free to download on the App Store, and the first 14 days are on us. It is a voice lab notebook with private, on-device AI. You speak the note while your hands are busy at the bench. Every note is timestamped and organized into Objective, Materials, Procedure, Observations, and Conclusion. You review it, seal it, and export to PDF, Word, or your ELN.
A photo of a reagent label fills in catalog, lot, and expiry, which is the materials line most often missing when a lot later has to be quarantined. Ask, powered by Apple Intelligence, answers questions about past experiments with citations to the exact notes, entirely on device. No account, no cloud, no tracking.
I would keep it beside the lab's existing record system rather than treat it as a validated ELN. It does not interpret a control or decide whether a run can be released.
The phone still has to respect the clean-work boundary. Capture the observation without touching the device with contaminated gloves, then review the note before you seal it into the completed record.
Start with a bounded first-week plan
- Choose one assay. Mark the two entry routes you will log, and name the field that would show each one.
- Draw the zone map and assign equipment to each zone, including any restricted-space compromises.
- Write the cleaning entries. Record surface, agent, concentration, contact time, and the procedure you are following.
- Place a control at each relevant stage and write, in advance, which record fields you will check if that control fails.
- Log every run for two weeks on the same sheet, so skipped glove changes and repeated interruptions show up as a pattern.
- Review the log before you interpret a borderline result. Keep the uncertainty in the note instead of rewriting the run as if the procedure had gone to plan.
A science experiment documentation workflow gives that review a consistent structure. The record has to show what happened, including departures from the intended procedure.
Verbex results, templates, and guides are aids, not scientific, safety, medical, or regulatory advice. Check every number before you act on it, and judge the procedure against local validation and safety rules.
Verbex is for capturing handling changes, timing, and observations before those details are rebuilt from memory. Visit Verbal Experiment or Verbex for on-device capture you can review and seal, then carry that record into the laboratory's existing documentation system.